


DIY Wood Pallet Wedding Projects
A former thrifty DIY Bride myself and now a Vintage Rental business owner and wedding designer, DIY is something we do often! And ohhh the lessons we have learned! Today we're sharing some tips for working with wood pallets. Hopefully we'll help you from a "Pinterest Fail".
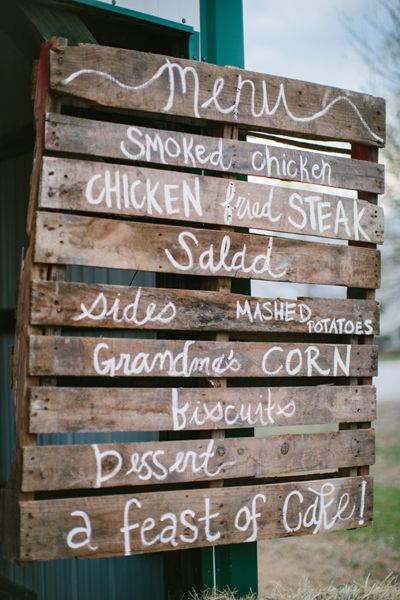
TONS OF GREAT IDEAS of how to utilize recycled wood pallets are all over Pinterest and leading wedding blogs. You can check out some of our favorites! In the meantime, let's talk the reality of working with these puppies!
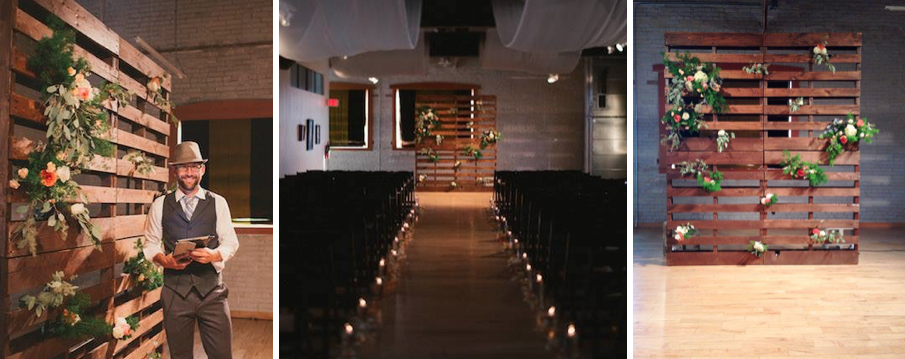
- Wood Pallets are hella heavy! Enlist the help of your friends or fiance when working with wood pallets. They are super heavy and large! Think about what your use for them is going to be. A large pallet backdrop looks awesome, but you are really going to have to think through how you will prevent it from toppling over, especially if you are adding floral or other weighted decor to it.
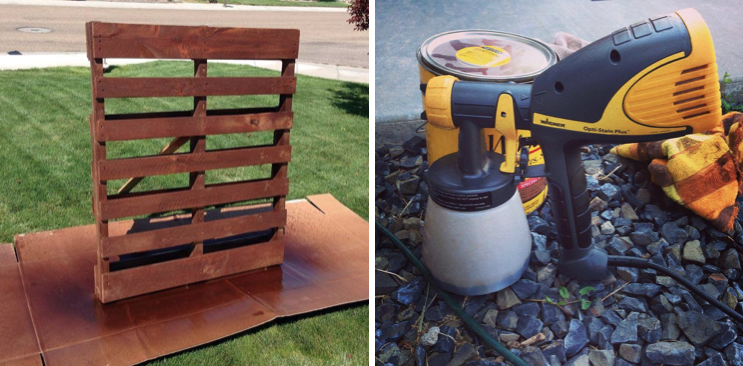
- Decide new vs old pallets. Is the end product going to look best with rustic upcycled wood pallets or would new be a better option. For us, we wanted not quite as rustic of a vibe old would offer, so we purchased new pallets and sanded the top of the boards down some for a smoother surface.
- Disassembling wood pallets takes some sweat! Get your crow bar out! But, BEWARE! Removing the boards can also cause them to split where the nail was in place. Take your time, but realize you may split them during the process. I personally liked working with brand new pallets from a local wood pallet supply company. Also if you want your project symmetrical, like our wood backdrop, make sure you pick the most similar pallets, otherwise, like us... you'll be forced to disassemble them and rebuild them to match.
- Staining wood pallets is a *^%#@ after the first attempt of staining wood pallets, I was ready to throw the project out! I was irritated, covered in stains and I was so sore from the crazy positions I had to put my body into to get to all those hard to reach places. So, here you go!
Insider Tip!
Do not stain with a brush! GET A SPRAY GUN! You'll blow (literally) through more stain this way, than doing it by hand, BUT, it'll take you less than 5 minutes vs 2 hours per pallet! Also, you need to cover the ground with more coverage than you see I did below... I killed some of my grass...
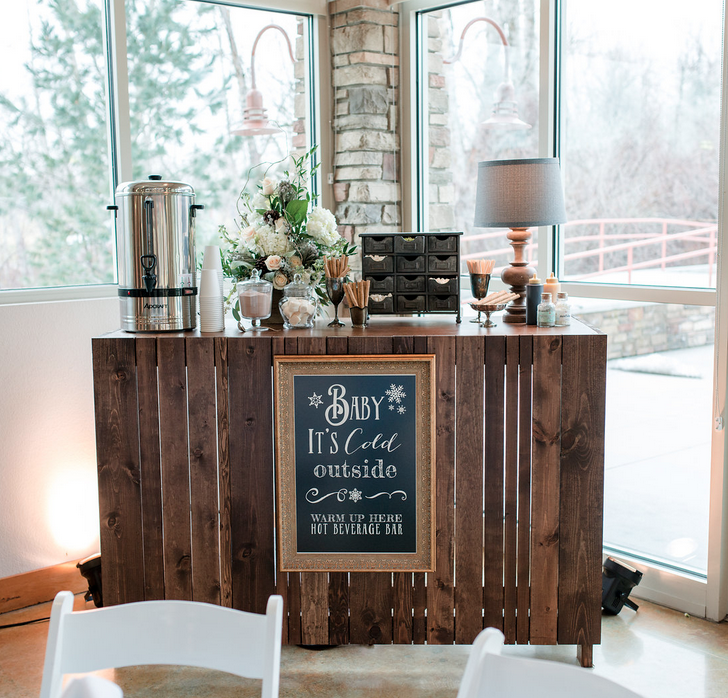
We LOVED this model we purchased from Lowes! The Wagner Opti Stain Plus for only $49.99! Keep in mind, it is for STAIN only! They have a different model if you are wanting to use paint. We used the Minwax Special Walnut from Home Depot for this project, which matches our custom bar.
Ira + Lucy Custom Wood Pallet Backdrop
Ira + Lucy Matching Bar
Hope this helps you with your wood pallet DIY projects! If this all seems like more work than you want to handle, you can rent for a fraction of the price! Contact us to rent our wood pallet backdrop!
[button url="http://iraandlucy.com/book/"]Contact[/button]